Bhavesh Parkhe

Control Systems | Autonomous Vehicles | Aspiring Minimalist
MS in Mechanical Engineering
University of Masscussetts Amherst
Home
About me
Projects
Resume/CV
LinkedIn Profile
Github Profile
Google Scholar
Behavior Cloning for Steering using CNN
Project description: This project was executed as a part of my Udacity Self Driving Car Nanodegree.The goals / steps of this project are the following:
- Use the simulator to collect data of good driving behavior
- Build, a convolution neural network in Keras that predicts steering angles from images
- Train and validate the model with a training and validation set
- Test that the model successfully drives around track one without leaving the road
- Summarize the results with a written report
Model Architecture and Training Strategy
1. Choosing a model architecture
My model consists of 2 convolution neural network layers with 5x5 filter sizes and depth of six.These are followed by their respective RELU activations and then a Max Pooling Layer.
Since the goal of the project was to correlate the steering angle with the lines of the road, having too many high level layers might cause it to overfit.
Therefore, only one fully connected layer of length 120 is used.
2. Attempts to reduce overfitting in the model
The model contained dropout layers initially. But their effectiveness in overfitting was similar to removing the fully connected layers altogether.
3. Model parameter tuning
The model used an adam optimizer, so the learning rate was not tuned manually.
4. Appropriate training data
Training data was chosen to keep the vehicle driving on the road. I used a combination of center lane driving, recovering from the left and right sides of the road and counterclockwise lap of the track. This also partly took care of the performance on the sharp turns and their recovery from them.
For details about how I created the training data, see the next section.
Model Architecture and Training Strategy
1. Solution Design Approach
The overall strategy for deriving a model architecture was to make sure the low level features like lines and curves are given more importance than the combined higher-level features.
My first step was to use a convolution neural network model similar to the LeNet architecture. I thought this model might be appropriate because it had the layers of convolution network at the beginning and fully connected layers only at the end which ensured clear segregation in higher level and lower level features.
In order to gauge how well the model was working, I split my image and steering angle data into a training and validation set. I found that my first model had a low mean squared error on the training set but a high mean squared error on the validation set. This implied that the model was overfitting.
To combat the overfitting, I modified the model so that there were more dropout layers. However, I did not want to include these dropout layers in the validation set too. Thus I removed them completely and tried removing the fully connected layers. I also removed an initial conv2d layer(3rd) which might not be necessary.
These steps ensure that the Validation loss was not greater than the training loss.
The final step was to run the simulator to see how well the car was driving around track one. There were a few spots where the vehicle fell off the track, specifically the muddy section at the end of the bridge. To improve the driving behavior in these cases, I collected multiple recovery datasets throughout the track and this spot.
At the end of the process, the vehicle is able to drive autonomously around the track without leaving the road.
2. Final Model Architecture
The final model architecture (model.py lines 49-59) consisted of a convolution neural network with the following layers and layer sizes
- 2D Convolutional layer (filter size = 5*5,Number of filters = 6)
- Max pooling Layer
- 2D Convolutional layer (filter size = 5*5,Number of filters = 6)
- Max pooling Layer
- Fully Connected layer length 120
- Final layer with single label output for steering
3. Creation of the Training Set & Training Process
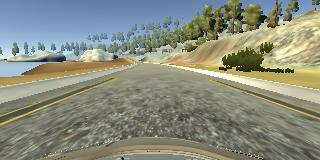
To capture good driving behavior, I first recorded two laps on track one using center lane driving. Here is an example image of center lane driving:
I then recorded the vehicle recovering from the left side and right sides of the road back to center so that the vehicle would not drive off the road at the slightest offset. These images show what a recovery looks like :
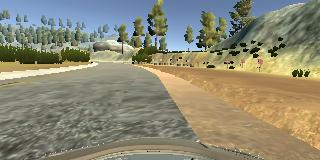
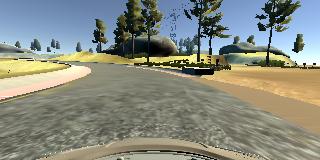
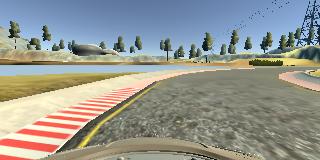
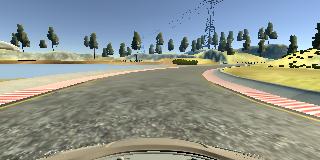
Then I repeated this process on track two in order to get more data points.
To augment the dataset, I also flipped images and angles thinking that this would account for additional data on the same section of the road.
After the collection process, I had ~4500 number of data points. I then preprocessed this data by flipping it which doubled its size.
I finally randomly shuffled the data set and put 20% of the data into a validation set.
I used this training data for training the model. The validation set helped determine if the model was over or underfitting. The ideal number of epochs was 4 as evidenced by the rising validation loss. I used an adam optimizer so that manually training the learning rate wasn’t necessary.